What the Cert, Unified Access Gateway or UAG
So this next post will be about using the same certificate we created in “Signing and Horizon Connection Server” and applying it to the UAG’s.
Topology
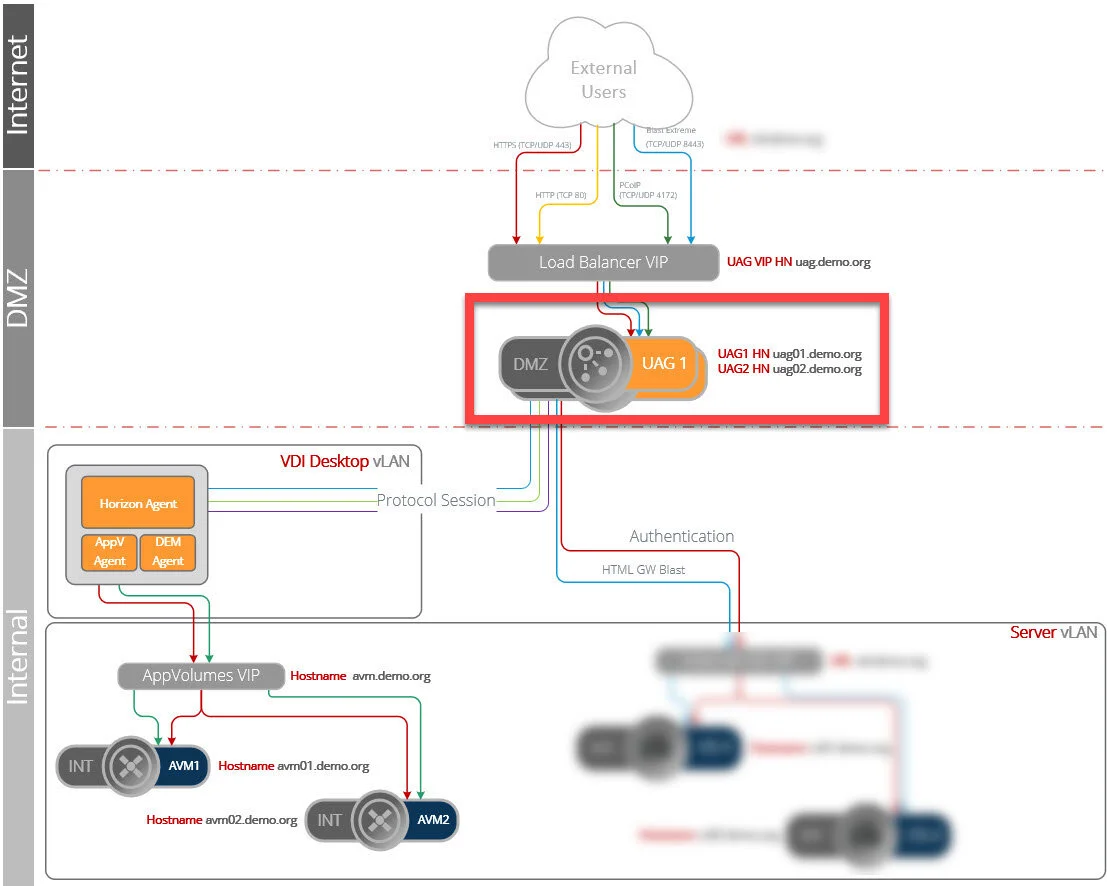
The blurred areas are complete
I have deployed a UAG and when I connect to the management I get the error about the certificate not being trusted. UAG admin page is https://fqdn:9443

Click Continue and login to the UAG and the select Configure Manually
Select TLS Server Certificate Setting
Check the Admin Interface (uag01.demo.org) and Internet Interface (vdi.demo.org)
Select Certificate Type as PFX
Upload PFX and Select hzcs.pfx
Enter the Password assign (from the previous post)

PFX Certificate