AppVolumes 4 - What the Package
Over the last few weeks I have been working with a customer who had a lot of 2.X AppStacks that needed to be migrated to AppVolumes 4. I utilized the VMWare AppVolumes migration utility which, for the most part, worked fine. I had some issues with AppStacks over (bigger than?) 6GB. I’m not sure if it was the AppStacks or the utility itself. In the end we ended up turning on 2.X feature in AVM 4 and moving the AppStacks.
AppVolumes 4 has done things a little differently. They are no longer called AppStacks, these are now called Packages. This is the Application/Program tab. At first I was confused, but now that things are making sense I thought I would share my findings. I am going to run through the “Package” creation.
First a visual,

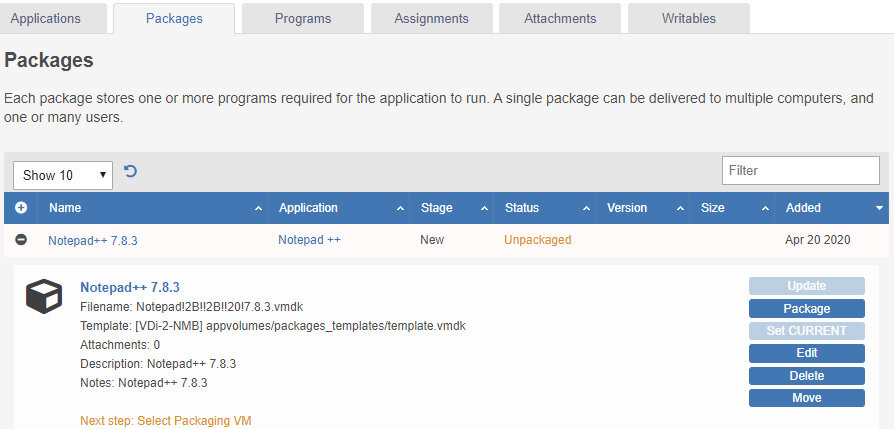
Notice Notepad ++ 7.8.3 has the flag Current set. This means users “Assigned” this Application will get that version of the Package
What do I have
AppVolumes 4 server
Capture VM
Notepad ++ install bits on file share
2 Security groups, Prod and Test
Capture VM
I am using Windows 10 x64 1809. Base install, VMTools, Patched with AppVolumes 4 agent installed with a powered off Snapshot.
Capture process
Nothing really has changed here from AppVolumes 2.X, except some of the wording and there are a few extra prompts.
Once logged into AppVolumes Manager, select Inventory > Applications and select Create
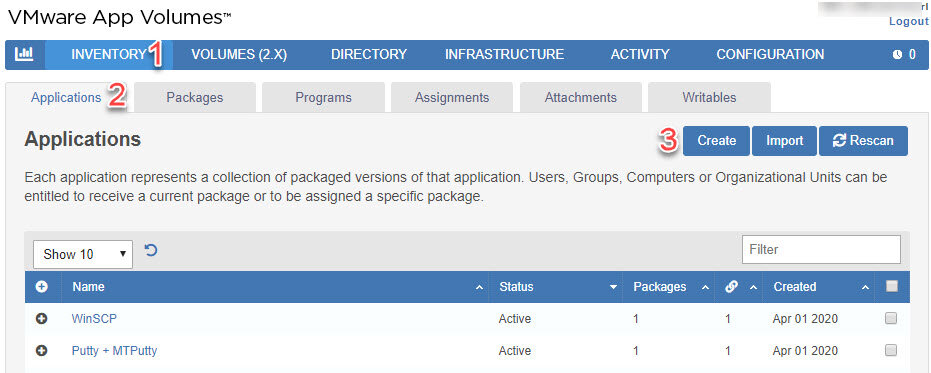
Name the Application, but don’t worry about putting in a version. Click Create
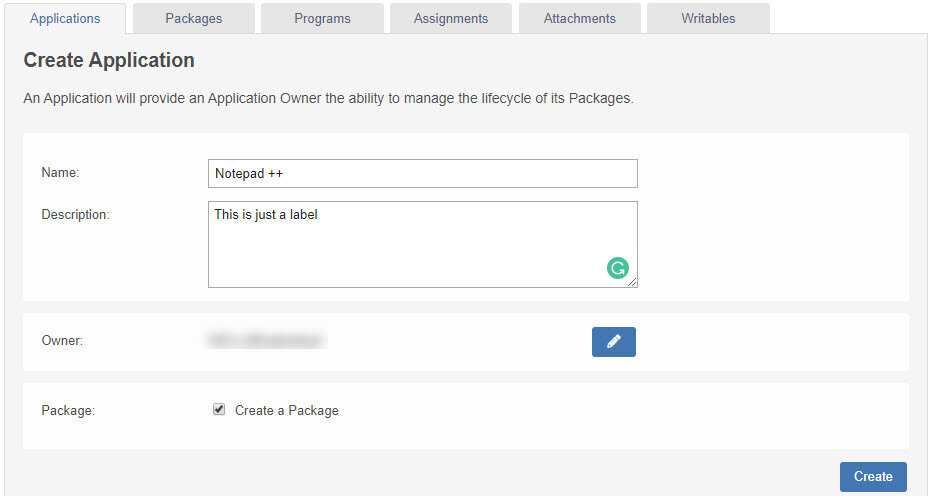
This is where we create the Package, I like to use the version in the naming.
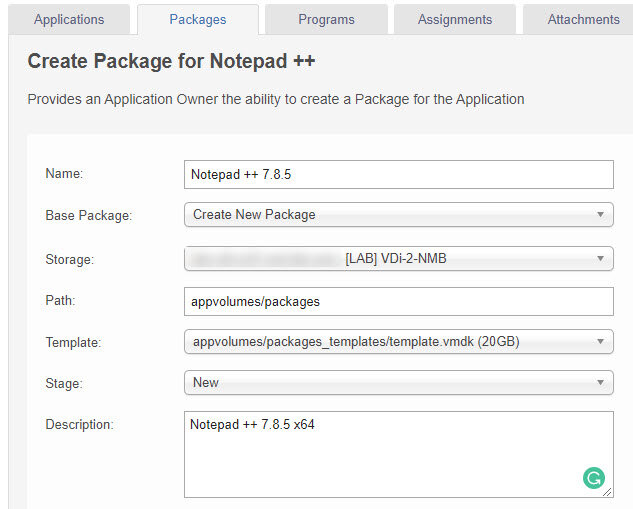
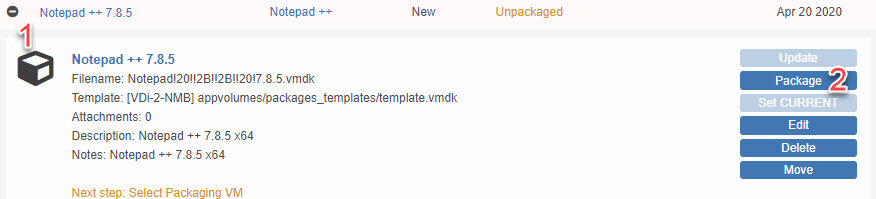
Click Create. Once that has finished creating and the console updated you should see the Notepad ++ Application listed. Select the Packages tab. You can see the package Status as Unpackaged, expand the Package and select Package
Add the name of the powered on Capture VM and search, Select the VM and click Package > Start Packaging.
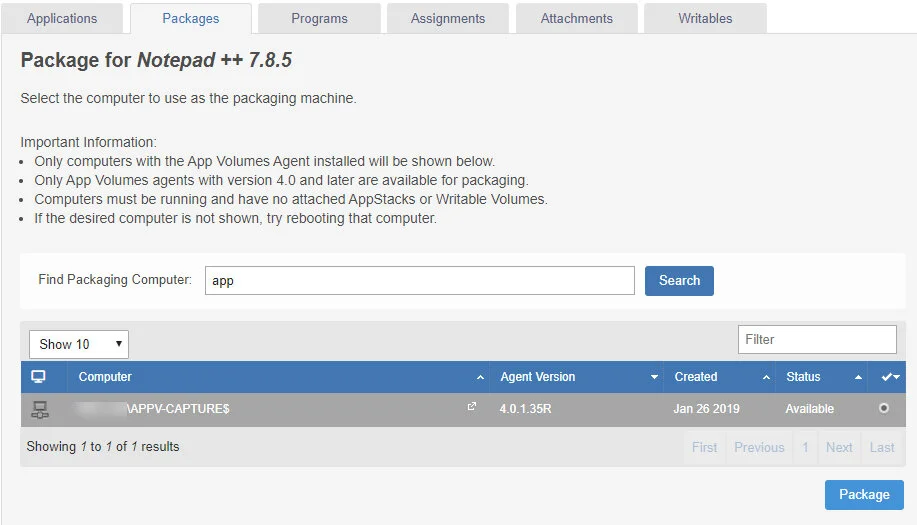
I have already downloaded the Notepad++ and placed them on a share. Login to the Capture VM and browse to the share where the install is located and install the application. Once Notepad ++ is installed click OK to perform the Packaging. Select Yes to complete.

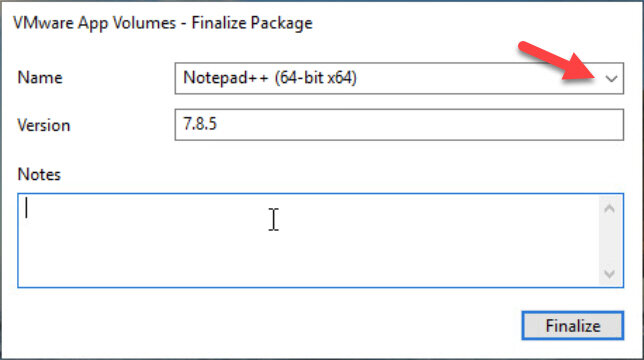
Verify that the version is correct, also notice the drop down. If you packaged multiple Applications you can flip between them. Click Finalize and then OK to restart
After the VM has rebooted, login and select OK to complete the process. Revert to the VM to the last known good snapshot and power on.
From the AppVolumes Manager select Notepad++ under the Applications Tab. Now we are going to create a second Notepad++ package, but a different version using the method as before. Expand Notepad++ and Select Create Package

This will flip to the packages tab. Fill in the in name etc. and select Create

From the Packages tab select the new package that was just created and select Package to start the process. From this point do the same as last time to complete the install of the different version of Notepad++
Once the second package is created you should see the following under the Applications Tab

0 Assignments, 2 packages and Current Flag not set
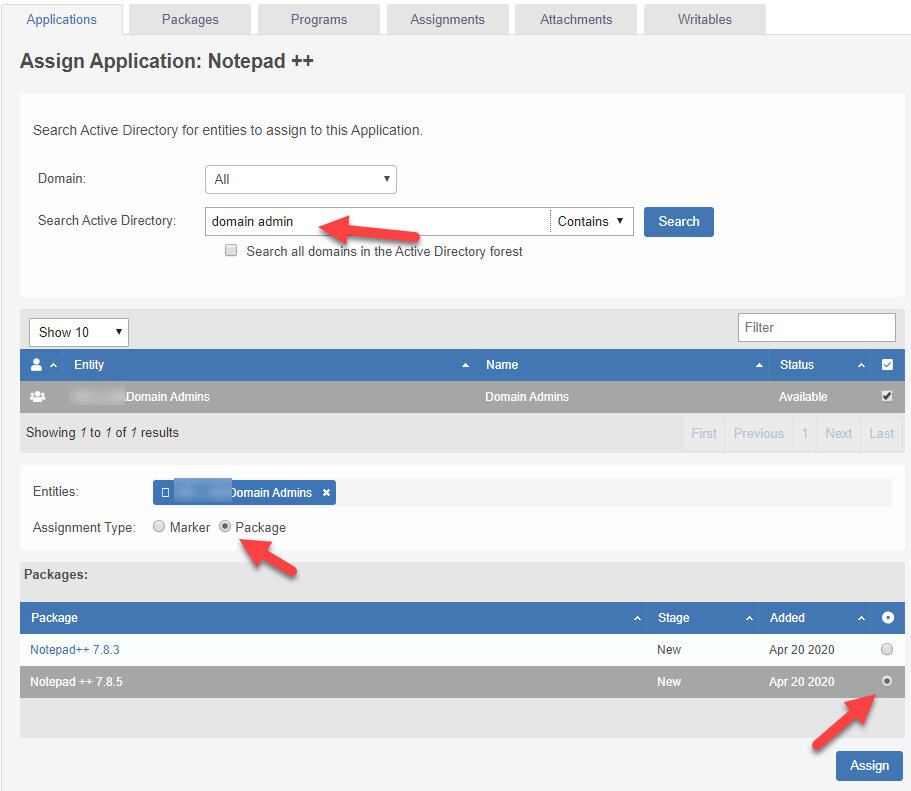
Select Assign, Search for and select the AD Group you want to Assign this Application, select Assign

Note: Notice the Current Marker is not yet set. Meaning that no one will get a package, Yet. Also notice Assignment Type
Go back to the Packages Tab, Select Notepad++ 7.8.3 and Select Set Current. Now we have SET the Current Package that will be received when an assigned user logins in to a desktop

So is this not the same as AppVolumes 2.X?
If my users were using Notepad++ 7.8.3 and I needed to upgrade them to Notepad ++ 7.8.5 but I needed to test this new Package first, I can assign the new Notepad++ 7.8.5 to a different Security Group. Select Applications > Notepad++ > Assign. Search for the new test group for 7.8.5, then Select Package and Select the Package and Click Assign
Now when I look at the Application we see the following: 2 Assignments, 2 Packages

Now swap back to the Packages Tab, select either Notepad++ Package and click Edit. For the Notepad++ 7.8.3 set the Stage to Published > Save and for the Notepad++ 7.8.5 set this to Test > Save

Now from the list of applications you are able to see the Stage for the Application Packages. Once the testing is complete and you’re satisfied and want to use Notepad++ 7.8.5, go to the package you wish the users to receive and click Set CURRENT. The next time the users login they will get the updated package.
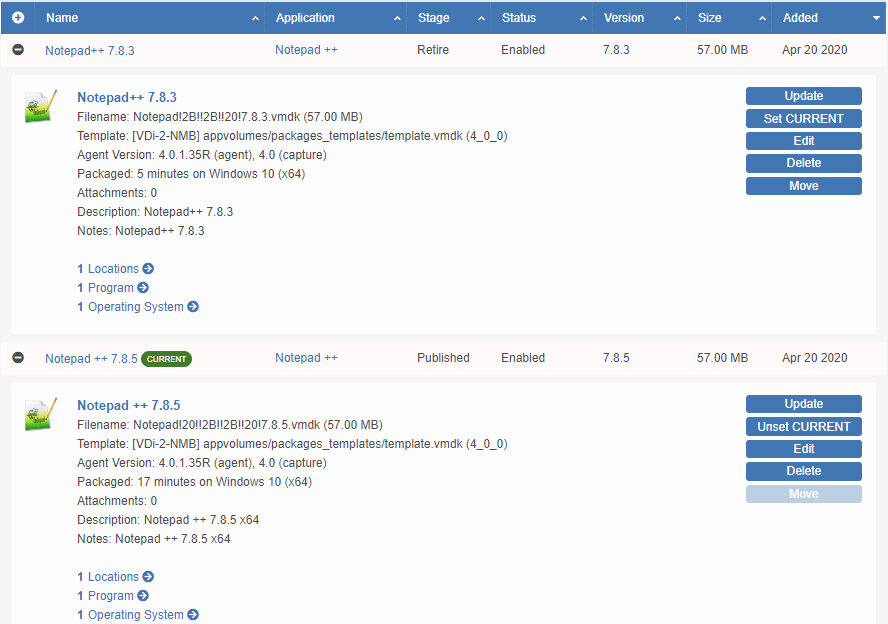
I set the 7.8.3 to retire, and 7.8.5 to Published.
This is a first great step to help with Application Life-cycle.
Hope this helps.